Sunday, 30 November 2014

Day 12-14 Challenge Task 8 - Making our own Table Lamp

Day 12-14 Challenge Task- Making our own Table Lamp 


We own this table lamp for the past 8 years and it was only used once - during my wedding day where the custom says that we must have a pair of table lamps lighted up over the night. After that, this table lamp have been kept in the storeroom until one day, I saw an inspiration on facebook on a DIY lantern. So this is became a challenge task 8. 

On top of having the table lamp, we bought some beads and a string of pink lace.
Natalie started stringing the beads together. While Emmanuel and Faith helped to clean the table lamp up by wiping and washing it thoroughly.


We glued the strings of beads onto the table lamp and glued the pink lace around it.

At the start of the project, Natalie already had this gift in mind for someone this Christmas. She observed that the person do not have a table lamp and thus would have use for this table lamp. Also, wanting to make this lamp even more special, she wanted to write this verse:

" Give all your worries and cares to God, for he cares about you" 

on the table lamp so that the person whom she is giving the gift to, will wake up everyday reading this verse. By the way, she learnt it from school and thought that this verse was appropriate for the person she is giving this gift to. She wrote the words herself using a golden marker.


I'm happy that Natalie managed to turn something as plain as the white table lamp to something so meaningful and beautiful. I'm sure the person receiving this gift will love her thoughtfulness and creativity.

Thursday, 27 November 2014

Day 11 Challenge Task: Making Wanton for Dinner and Siew Mai for breakfast


Day 11 Challenge Task: Making Wanton for Dinner and Siew Mai for breakfast


I love cooking with Natalie. She is such a good helper and we really enjoy our bonding time, cooking together. Today, Natalie is helping me to prepare 2 meals with just 1 set of ingredients.

Our Siew Mai.

Our Wanton


All you need is: 
1) Minced meat
2) Prawns
3) Dried Mushrooms
4) Wanton skin


Separate the prawns into 2 bowls.

                                               Leave the prawn whole for making siew mai.


Cut the prawns into smaller pieces for making wanton.


                                 Simple Wanton Recipe

Soak the dried mushroom and cut them into cubes. 


Mix the small pieces of prawn, mushroom and meat together.

Crack an egg and pour the egg white into the meat. Leave the egg yolk in another bowl. You will need it to wrap the wanton later.

Add a little light soya sauce, abalone sauce (or oyster sauce) and a dash of pepper. And your meat is ready.


Scoop half a spoon of meat on to the wanton skin. 


Spread the egg yolk on the edge on 2 sides of the wanton skin.


Fold the skin into a triangle.


Press the sides together and make sure it sticks together.


It is ready. You can cook these in chicken soup or even fry it. Yummy. Can't wait to eat it. 


                               Simple Recipe for Siew Mai

Mix the meat with the whole small prawns into a small bowl. Add a little light soya sauce, abalone sauce (or oyster sauce) and a dash of pepper.


Wrap the meat up in wanton skin.


Shape it like Siew Mai and cut of the extra skin. 
If you need the skin to stick together, use the egg yolk.
I cut cubes of carrot to put it on top, just to make it look nicer.
 I place the Siew Mais into a plastic tray for Siew Mai and I am keeping it in the freezer and will steam it up for breakfast tomorrow.


Preparing 2 meals with just 1 set of ingredients makes cooking more efficient. Moreover, Natalie had great fun in the kitchen. This is so easy to make and only involves a pair of scissors to cut the prawns and mushrooms. After having fun preparing our wanton and Siew Mai, we simply can't wait to eat them up. Will post photos of our dish later. 

Monday, 24 November 2014

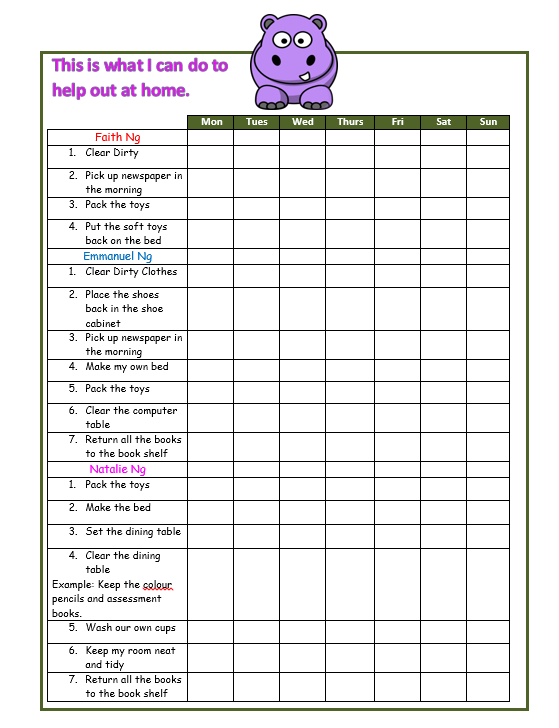
Day 7 Challenge Task: Creating a Task List- This is what I can do to help out at home

Day 7 Challenge Task: Creating a Task List 

The children have been helping out at home most of the time, but I wanted to create a list for them to give them recognition for what their effort. 

This is the end product we came out with. 

Job Scope: Day 7 of the end of year holidays, I finally sat all the children down and I made them identify the things they can do to help out. Well, I helped to type them down into this chart. The children came out with this list. Certain tasks are repeated because they felt that all of them can contribute. 

 Deployment: Then, they had to identify who is the best person to do the job.

Reorganizing the Chart: Finally, I have to teach them to re-organise the chart so that it becomes very clear who has to do what. 
This is the end product.
If you noticed, the chart initially had the words " Weekly Task List" on it. However, I eventually replaced it with "This is what I can do to help out at home".  It is important for the children to see it as their duty to help out and they are helping out because they want to, not because they are asked to. To me, the difference is very important. It's the attitude and mentality.

Also, I will give them a sticker to recognize their effort each day. The kids can't wait to help out now. Start getting your child to identify how they can help around the house.

Sunday, 23 November 2014

Day 3 Challenge Task: Christmas Family Tree

Day 3 Challenge Task: Christmas Family Tree

Presenting our very own, special Christmas Family Tree. Natalie was really the project manager for this. She conceptualized the idea, collected the materials and under her guidance, we managed to put it together. It was a super challenging task but the Christmas Family Tree is simply amazing.


 Let's start with us collecting the materials.


We used the pine cones that we picked up from Bishan Park.

The rest of the materials were simply some twigs and some dried long plants (which we do not know the name) and 2 ping pong balls. 

We painted the pine cone and ping pong ball silver.

We used twigs and made a star out of it. We painted it gold. 


Our star at the top of the Christmas Family tree. 


We made a little round Candy Cane and a reindeer out of the long plant that we found. 


We bought these from Daiso. We wanted to use the beads for making snowflakes using ice cream sticks, but we decided not to.


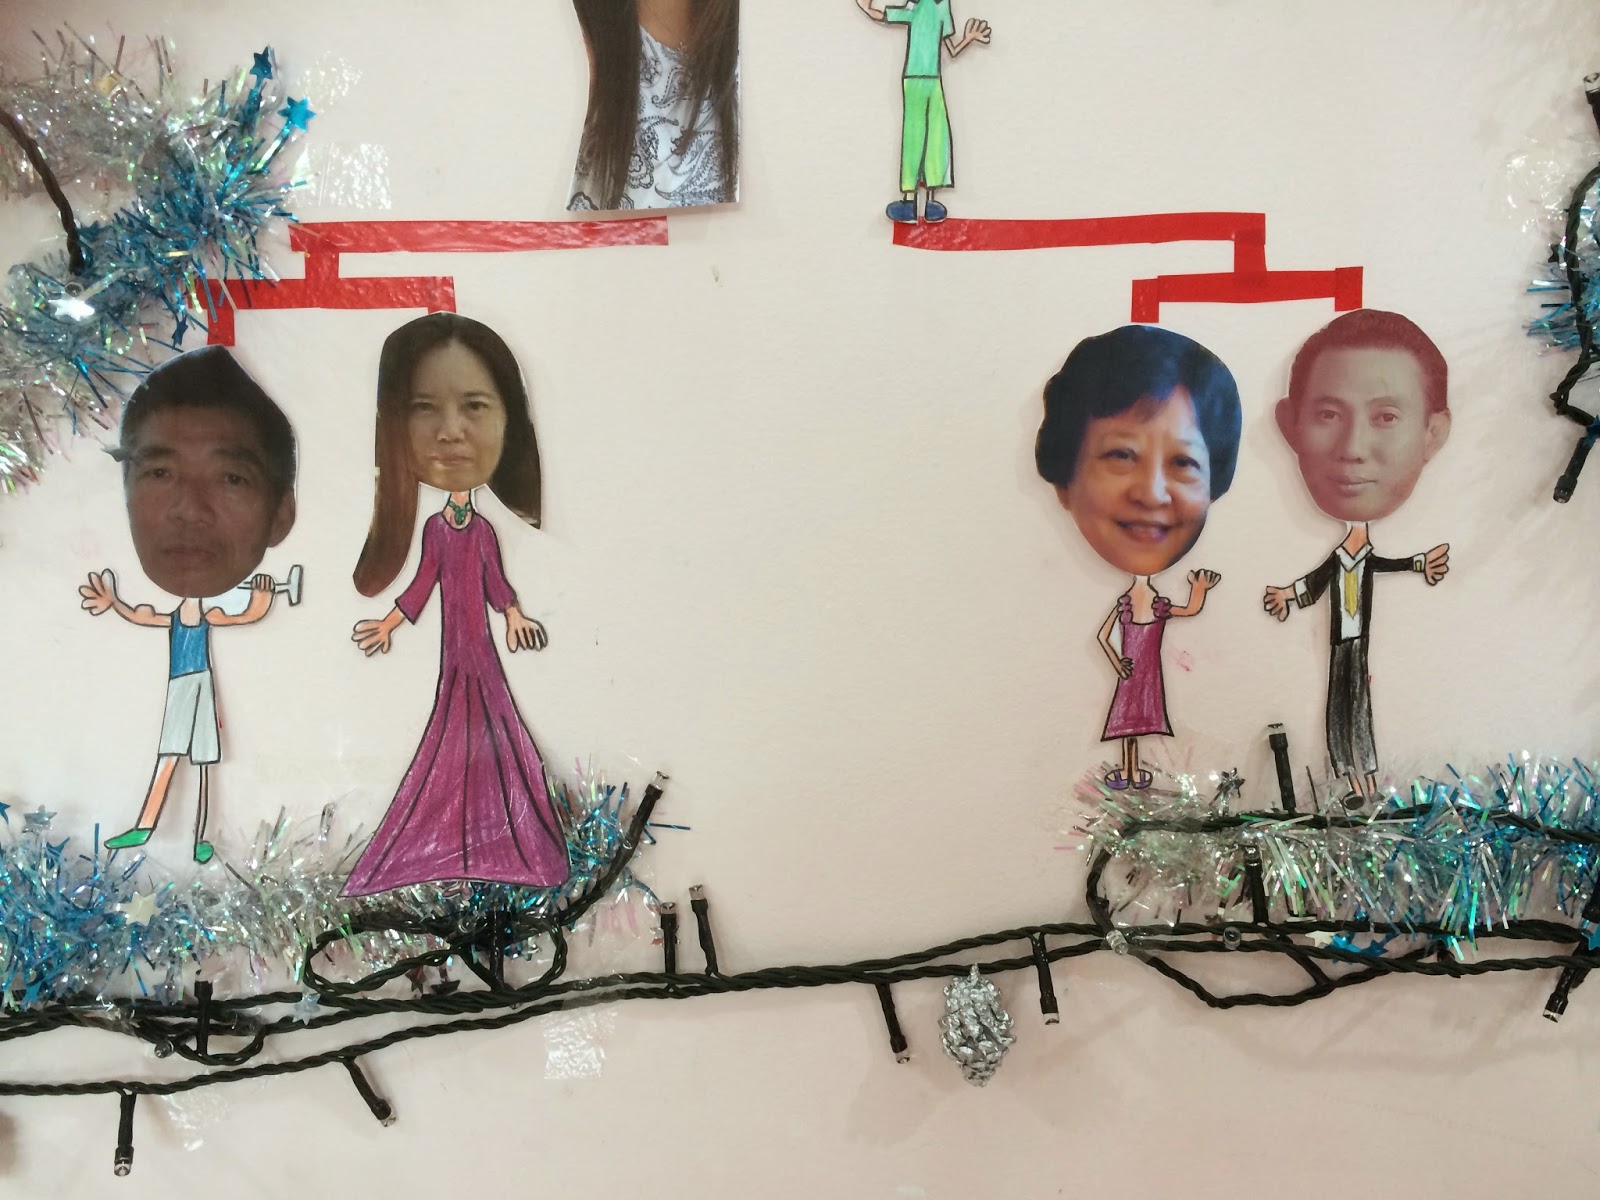
Back to the most important part of our Christmas Family Tree - representing our family members. We printed photographs of the 3 generations in our family. And suddenly, Natalie has another fantastic idea.

Give each family member a cartoon body. So so so cute.. I totally love this idea!

 Emmanuel insisted on giving himself a skeleton body. All the drawings of our family members with the except of Emmanuel's were done 100% by Natalie. Natalie refuse to draw a skeleton for Emmanuel because she felt it was inappropriate for the family tree. In the end, I had to help Emmanuel draw his skeleton body. 


Finally, we spent a whole day putting the Christmas Family tree together. It wasn't easy getting everything to stick to the wall. Yes, we really spent a whole afternoon just putting it up.


At the end of our 3 days effort, we finally created our very own Christmas Family Tree. The 3 very proud children insisted on taking a picture with their wonderful piece of art work. 

Taking a closer look.

By the way, Faith stood still for about 5 mins so that Natalie can draw her body as what she was wearing exactly.  
Natalie and her siblings
Natalie: "Mummy doesn't need a body as she looks good enough in the picture." Haha... Natalie says it's too difficult to cut out the shape of my hair, so she decided to leave me alone.. Yeah!

Mummy and Daddy


Grandparents


 Finally, we ended our day 3 challenge task of the Christmas Family Tree. I really think that this task is very meaningful, for Christmas, we give thanks that Christ the Saviour was born and for everything we have- our family.


Saturday, 22 November 2014

Hama Beads Craft

Hama Beads Craft 

On some days, you may just want to engage your kids while you sit back and relax. So this is one of the activities you can get your kids to do... Hama beads..


Generally, they can be left alone to do the Hama Beads on their own. You purchase the template for certain designs such as flower, bear, dog or princess for the younger kids so that they can work on them independently. For the older kids, I simply gave her a square template and she is free to create anything she wants. 

This activity really trains the child's patience and at the same time, creativity and hand eye coordination. 
Natalie working on her cupcake.

Emmanuel working on his Darth Vader from a square template.

There it is.. the Mask of Darth Vader.

Other designs that the children have made.


Using 2 heart shapes to create a butterfly. 


Finally, I gave them some space on a wall and this is the picture they created. So the kids are free to create more Hama Beads designs to be added onto this wall..